Royal Icing Recipe
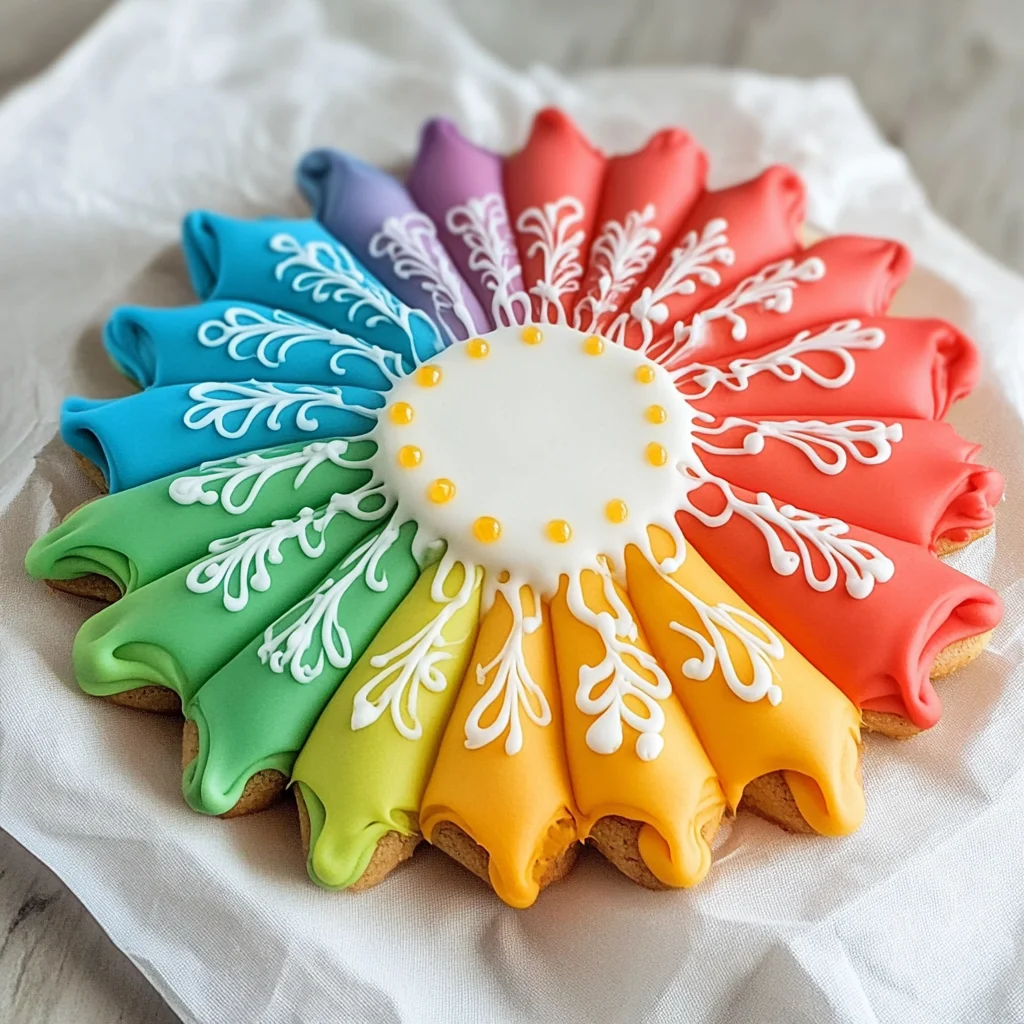
If you’re looking for a way to elevate your cookie decorating game, you’ve come to the right place! This Royal Icing Recipe is a game-changer and a family favorite of mine. It’s perfect for sprucing up sugar cookies for any occasion, whether it’s a holiday gathering, a birthday party, or just a cozy weekend baking session with the kids. The smooth, glossy finish of royal icing transforms ordinary cookies into little pieces of art that everyone will adore.
What makes this recipe so special is its simplicity. With just a few ingredients and easy steps, you can create stunning designs that will impress your friends and family. Plus, it’s a great way to spend time together in the kitchen, making memories while having fun!
Why You’ll Love This Recipe
- Easy to make: With just a few simple steps, you’ll be whipping up delicious icing in no time.
- Kids will love it: This recipe is perfect for involving little hands in the decorating process!
- Customizable colors: Use gel food coloring to match any theme or occasion—let your creativity shine!
- Perfect for storage: Once your cookies are iced, they harden beautifully and can be stored without losing their charm.
- Versatile use: Not just for cookies! This royal icing can also be used on cakes and other confections.
Ingredients You’ll Need
Let’s gather our ingredients! You’ll find that these are simple and wholesome items that you might already have at home. Here’s what you need for this fabulous royal icing:
For the Icing
- 2 pounds powdered sugar (sifted)
- 5 tablespoons Genie’s Dream Premium Meringue Powder
- 2/3 cup water (plus more for flood icing)
- gel food coloring (as desired)
Variations
One of the best things about this royal icing recipe is how flexible it is! Feel free to get creative and adjust it to your liking with these fun variations:
- Make it flavored: Add a few drops of vanilla or almond extract to give your icing an extra layer of flavor.
- Change the consistency: For thicker icing perfect for piping details, reduce the water slightly; add more water for flood icing.
- Use different colors: Experiment with different gel food colors to create beautiful designs tailored to any celebration.
- Add sprinkles: After piping your designs, sprinkle some edible glitter or sprinkles on top before the icing sets!
How to Make Royal Icing Recipe
Step 1: Combine Ingredients
Start by combining all your ingredients in the bowl of a stand mixer. If you don’t have one handy, no worries! A large bowl and hand mixer work just fine too. Mix on low speed using a whisk attachment until everything comes together; this prevents powdered sugar from flying everywhere.
Step 2: Whip It Up!
Now it’s time to turn up the speed! Increase to medium/high and mix for about 5 minutes until the icing becomes thick, shiny, stiff, and white. You want those peaks standing tall without flopping over—this means your royal icing is ready!
Step 3: Add Color
If you’re feeling adventurous and want multiple colors, divide the icing into separate bowls. Then beat in your gel food coloring by hand with a rubber spatula until you achieve your desired shades.
Step 4: Get Piping!
Once you have all your colors ready and at the right consistency for piping (check out my notes above!), transfer them into piping bags. Now comes the fun part—decorate those cookies! Let your imagination run wild!
Step 5: Let Them Harden
After you’ve beautifully iced your cookies, allow them to harden at room temperature for at least 12 hours before storing. This step ensures they set perfectly so you can enjoy them later without smudging any designs.
There you have it—a delightful Royal Icing Recipe that will make your cookie decorating dreams come true! Enjoy every moment spent creating sweet treats with this easy-to-follow guide. Happy baking!
Pro Tips for Making Royal Icing Recipe
Making royal icing can be a fun and creative experience, especially with these handy tips to ensure your icing turns out perfectly every time!
-
Use sifted powdered sugar: Sifting your powdered sugar removes any lumps and ensures a smooth texture, which is crucial for achieving that beautiful, glossy finish.
-
Check your meringue powder: Make sure your meringue powder is fresh. Old meringue powder can lead to inconsistent results in texture and stability.
-
Adjust water gradually: When making flood icing, add water slowly to achieve the perfect consistency. It should flow smoothly but hold its shape when piped.
-
Cover with a damp cloth: While you’re working with your royal icing, keep it covered with a damp cloth or plastic wrap to prevent it from drying out and forming a crust.
-
Practice piping techniques: Don’t hesitate to practice different piping techniques on parchment paper before decorating your cookies. This will help you gain confidence and control over your designs!
How to Serve Royal Icing Recipe
Royal icing is not just for cookies; it’s a versatile decoration that can elevate your dessert game! Here are some delightful ways to serve and present your beautifully decorated treats.
Garnishes
- Edible glitter: A sprinkle of edible glitter adds sparkle and whimsy, making your cookies look extra special.
- Colored sugar sprinkles: These add both color and texture, enhancing the visual appeal of your decorated cookies.
Side Dishes
- Fresh fruit platter: A vibrant assortment of seasonal fruits complements the sweetness of royal icing cookies perfectly while adding freshness.
- Herbal tea: A warm cup of herbal tea balances the sweetness of the cookies and makes for a cozy pairing.
- Cheese platter: A selection of mild cheeses offers a savory contrast to sweet iced cookies, creating an enjoyable balance for the palate.
- Chocolate mousse: For those who love chocolate, serving light chocolate mousse alongside the cookies provides an indulgent treat that pairs beautifully with the sweetness of royal icing.

Make Ahead and Storage
This Royal Icing Recipe is perfect for meal prep, making it easy to whip up beautiful decorations in advance. Whether you’re planning a baking session or preparing for a special occasion, you can store your icing and keep everything organized.
Storing Leftovers
- Store any leftover royal icing in an airtight container at room temperature.
- To prevent the icing from hardening, cover the surface with plastic wrap directly touching the icing.
- Use within a week for the best results.
Freezing
- Royal icing can be frozen for longer storage.
- Place it in an airtight container or freezer-safe bag, removing as much air as possible before sealing.
- It can be frozen for up to three months.
Reheating
- When ready to use frozen royal icing, thaw it in the refrigerator overnight.
- Before using, give it a good stir to restore its original consistency. You might need to add a little water if it’s too thick.
FAQs
Here are some common questions about this delightful royal icing recipe!
What is royal icing made of?
Royal icing is made from powdered sugar, meringue powder, and water. This combination creates a smooth and glossy finish perfect for decorating cookies.
How do I achieve different consistencies with this Royal Icing Recipe?
To achieve different consistencies, adjust the amount of water you add. For piping outlines, use less water; for flooding, increase the amount until you reach a pourable consistency.
Can I make royal icing in advance?
Absolutely! This Royal Icing Recipe is great for making ahead of time and storing. Just follow the storage tips above to ensure freshness.
How long does royal icing take to dry?
Royal icing typically takes about 12 hours to dry completely at room temperature. Ensure your cookies are left undisturbed during this time for best results.
Final Thoughts
I hope you enjoy making this Royal Icing Recipe as much as I do! It’s such a fun way to elevate your cookie decorating skills and impress your friends and family with beautiful treats. Remember, practice makes perfect, so don’t hesitate to experiment with colors and designs. Happy decorating!
Royal Icing Recipe
Elevate your baking with this easy Royal Icing Recipe, perfect for decorating cookies, cakes, and more! This simple meringue-based icing is a family favorite that transforms ordinary baked goods into stunning masterpieces. Whether you’re preparing for a holiday gathering or a cozy weekend baking session, this recipe offers a smooth, glossy finish that everyone will adore. It’s not only fun to make but also a wonderful way to spend time with loved ones in the kitchen. Customize your colors and flavors to match any occasion, and watch as your cookies become delightful treats that impress friends and family alike!
- Prep Time: 10 minutes
- Cook Time: N/A
- Total Time: 0 hours
- Yield: Approximately 48 servings 1x
- Category: Dessert
- Method: N/A
- Cuisine: N/A
Ingredients
- 2 pounds powdered sugar (sifted)
- 5 tablespoons meringue powder
- 2/3 cup water (plus more for flood icing)
- Gel food coloring (as desired)
Instructions
- Combine all ingredients in a stand mixer or large bowl with a hand mixer. Mix on low speed until well combined.
- Increase speed to medium/high and whip for about 5 minutes until thick, shiny, and peaks form.
- Divide icing into bowls if using multiple colors; mix in gel food coloring to achieve desired shades.
- Transfer icing into piping bags and decorate cookies as desired.
- Allow decorated cookies to harden at room temperature for at least 12 hours before storing.
Nutrition
- Serving Size: 1 tablespoon (15g)
- Calories: 60
- Sugar: 15g
- Sodium: 0mg
- Fat: 0g
- Saturated Fat: 0g
- Unsaturated Fat: 0g
- Trans Fat: 0g
- Carbohydrates: 15g
- Fiber: 0g
- Protein: 0g
- Cholesterol: 0mg

