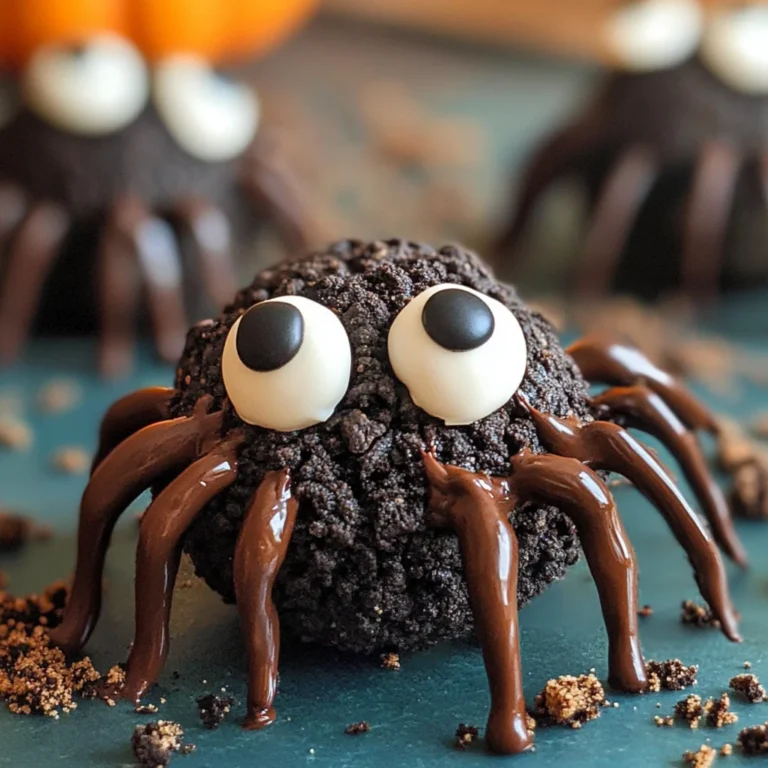
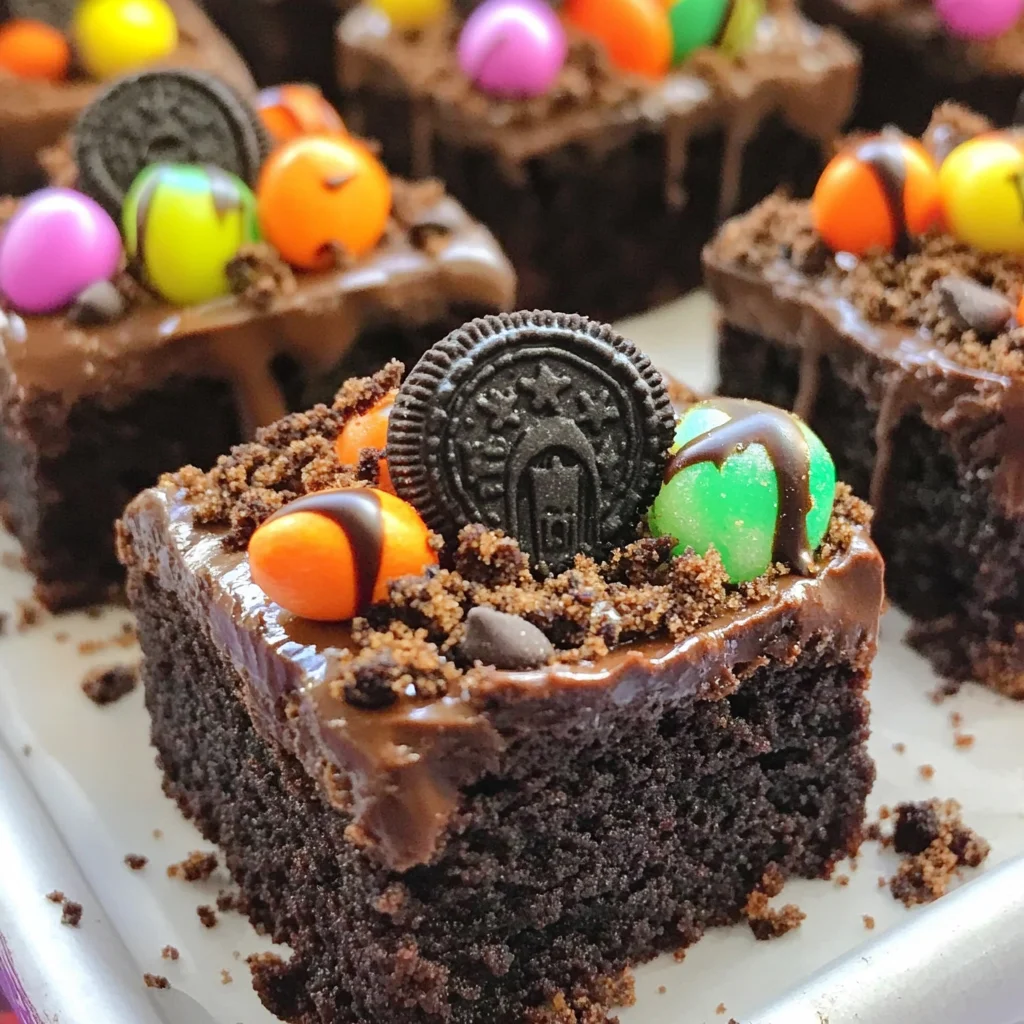
Graveyard Brownie Bites
If you’re looking for a sweet treat that will thrill both kids and adults alike, you’ve landed in the right place! These Graveyard Brownie Bites are not only adorable but also incredibly easy to whip up. Picture this: bite-sized brownie delights topped with spooky decorations, perfect for Halloween parties or cozy family gatherings. They bring together the rich taste of chocolate and the fun of festive candies—what’s not to love?
I adore this recipe because it requires minimal effort while delivering maximum impact. It’s also a fantastic way to get the kids involved in the kitchen. Let’s dive into making these delightful bites that are sure to become a staple at your celebrations!
Why You’ll Love This Recipe
- Super simple preparation: With just a few ingredients and no baking required, you’ll have these treats ready in no time.
- Family-friendly fun: Kids will love decorating their own brownie bites, making it a perfect activity for any gathering.
- Make ahead convenience: Prepare them earlier in the day and store them until it’s time to serve, saving you stress on party day.
- Deliciously indulgent: Rich, chocolatey goodness paired with crunchy Oreo crumbs creates an irresistible flavor combo.

Ingredients You’ll Need
This recipe uses simple, wholesome ingredients that you might already have in your pantry. It’s all about creating that delicious chocolate experience without any fuss!
For the Brownie Bites
- 12 Store Bought Brownie Bites
For the Topping
- Oreo Crumbs
- 1/2 cup Chocolate Chips
- 1 1/2 tbsp Butter
- 2 tsp Milk
- 2 tsp Corn Syrup
- Graveyard Candies
Variations
One of the best things about Graveyard Brownie Bites is how flexible they are! Feel free to mix things up based on what you have on hand or your favorite flavors.
- Switch up the toppings: Use gummy worms or candy pumpkins for a different take on the graveyard theme.
- Try different brownie bases: If you’re feeling adventurous, make homemade brownies instead of store-bought for an extra personal touch.
- Add some crunch: Sprinkle chopped nuts or crushed pretzels on top for added texture and flavor.
- Go gluten-free: Use gluten-free brownie bites and Oreos to make these treats suitable for everyone.
How to Make Graveyard Brownie Bites
Step 1: Set Up Your Workstation
Start by laying out 12 brownie bites on a piece of parchment paper. This makes it easier to decorate without any mess. Plus, it’s always nice to have a dedicated space for your creativity!
Step 2: Prepare Your Oreo Crumbs
Grab a handful of Oreos and pulse them in a food processor until they turn into fine crumbs. This creates that classic “dirt” effect we want for our graveyard theme. Set aside these lovely crumbs; they’ll add both flavor and decoration!
Step 3: Make the Ganache
In a microwave-safe bowl, melt together your chocolate chips, butter, milk, and corn syrup for about 30 seconds. Stir until everything is combined and smooth. This glossy ganache will act as glue to hold your toppings in place while adding rich chocolate flavor.
Step 4: Assemble Your Brownie Bites
Spoon a little ganache onto each brownie bite. It doesn’t need to be perfect; just enough to create a sticky surface for your crumb topping!
Step 5: Add the Oreo Crumbs
Now it’s time for those Oreo crumbs! Heap piles of them on top of each brownie bite while the ganache is still warm. They should stick nicely and resemble little mounds of dirt over our spooky graves.
Step 6: Garnish with Graveyard Candies
Finally, let your creativity shine! Garnish each brownie bite with graveyard candies like gummy worms or spooky decorations. This final touch transforms them into hauntingly cute treats ready for any Halloween celebration.
Enjoy sharing these Graveyard Brownie Bites with friends and family—just be prepared for everyone asking for seconds!
Pro Tips for Making Graveyard Brownie Bites
These delightful Graveyard Brownie Bites are sure to impress your guests, and a few helpful tips can make the process even easier!
-
Use Fresh Ingredients: Using fresh chocolate chips and high-quality Oreos will enhance the overall flavor of your brownie bites, making them even more irresistible.
-
Chill Before Serving: Allowing the brownie bites to chill in the fridge for about 10 minutes after assembling helps the ganache set, making each bite less messy and more enjoyable.
-
Customize Your Candies: Feel free to get creative with your graveyard candies! Use gummy worms or candy pumpkins to cater to your theme and add more variety to your presentation.
-
Make Ahead of Time: Preparing these brownie bites a day in advance can save you time on party day. Just store them in an airtight container and let them come to room temperature before serving.
How to Serve Graveyard Brownie Bites
Presentation is key when it comes to impressing guests, especially during Halloween! There are several fun ways to serve these spooky treats that will help set the mood for your gathering.
Garnishes
- Spooky Sprinkles: Add some Halloween-themed sprinkles on top of the ganache for an extra festive touch.
- Chocolate Drizzle: A light drizzle of melted chocolate over the Oreo crumbs can add a nice contrast and look visually appealing.
Side Dishes
- Pumpkin Soup: This creamy soup is a perfect pairing, offering a warm and cozy complement to the sweet brownie bites.
- Apple Slices with Caramel Dip: Fresh apple slices served with a rich caramel dip provide a refreshing crunch that balances out the sweetness of the brownies.
- Savory Cheese Platter: Include an assortment of cheeses, crackers, and fruits for guests who might prefer something savory amid all the sweets.
- Mini Corn Dogs: These bite-sized treats add a fun element to your spread and offer a savory contrast that rounds out your Halloween menu perfectly.
With these tips and serving suggestions, your Graveyard Brownie Bites will not only taste amazing but also look like a showstopper at any Halloween gathering! Enjoy creating memorable moments with friends and family this spooky season.
Make Ahead and Storage
These Graveyard Brownie Bites are perfect for meal prep, making them an excellent choice for your Halloween gatherings. You can prepare them in advance, allowing you to enjoy the festivities without feeling rushed.
Storing Leftovers
- Store any leftover brownie bites in an airtight container at room temperature for up to 3 days.
- For longer freshness, keep them in the refrigerator where they can last up to a week.
Freezing
- If you’d like to make these treats ahead of time, freeze the unadorned brownie bites.
- Place them in a single layer on a baking sheet until frozen solid, then transfer to a freezer-safe bag.
- They can be frozen for up to 2 months; just be sure to wait until you’re ready to serve before adding the ganache and toppings.
Reheating
- To enjoy your brownie bites after freezing, allow them to thaw in the refrigerator overnight.
- If you prefer them warm, microwave them for about 10-15 seconds before garnishing with ganache and Oreo crumbs.
FAQs
Here are some common questions about making Graveyard Brownie Bites!
Can I use homemade brownies instead of store-bought for Graveyard Brownie Bites?
Absolutely! If you have a favorite brownie recipe, feel free to bake a batch and cut them into bite-sized pieces. Just ensure they are cooled completely before decorating.
How do I keep my Graveyard Brownie Bites from getting soggy?
To prevent sogginess, make sure that the ganache is not too thick and is applied just before serving. This helps maintain the texture of the brownies while still delivering that delicious chocolate flavor.
Can I customize the graveyard candies used on my Graveyard Brownie Bites?
Definitely! Feel free to use any spooky-themed candy or decorations that you love. Gummy worms, chocolate tombstones, or candy pumpkins can all add a fun twist!
Final Thoughts
I hope you enjoy creating these delightful Graveyard Brownie Bites as much as I do! They’re not only simple and quick to make but also add a festive touch to your Halloween celebrations. Remember, cooking should be fun and allow your creativity to shine. So gather your ingredients and get ready to impress your guests with these charming treats—happy baking!
Graveyard Brownie Bites

If you’re looking to add a delightful and spooky touch to your Halloween festivities, these Graveyard Brownie Bites are the perfect treat! These easy-to-make, no-bake brownie bites combine rich chocolate flavor with fun decorations that will thrill both kids and adults alike. Topped with crunchy Oreo crumbs and creatively styled with graveyard-themed candies, these treats are not only visually appealing but also incredibly delicious. With minimal effort required for maximum fun, they make an excellent activity for family gatherings or Halloween parties. Get ready to impress your guests with these charming and indulgent delights!
- Prep Time: 15 minutes
- Cook Time: 0 minutes
- Total Time: 15 minutes
- Yield: Makes 12 servings 1x
- Category: Dessert
- Method: No-Bake
- Cuisine: American
Ingredients
- 12 Store Bought Brownie Bites
- Oreo Crumbs
- 1/2 cup Chocolate Chips
- 1 1/2 tbsp Butter
- 2 tsp Milk
- 2 tsp Corn Syrup
- Graveyard Candies (pectin-based gummy candies or candy pumpkins)
Instructions
- Set up your workstation by laying out the brownie bites on parchment paper.
- Process Oreos into fine crumbs to create a dirt-like texture.
- In a microwave-safe bowl, melt chocolate chips, butter, milk, and corn syrup together until smooth to create a ganache.
- Spoon ganache onto each brownie bite for a sticky surface.
- Sprinkle Oreo crumbs over the ganache while it's still warm.
- Decorate with graveyard candies to complete your spooky treats.
Nutrition
- Serving Size: 1 brownie bite (35g)
- Calories: 150
- Sugar: 10g
- Sodium: 30mg
- Fat: 7g
- Saturated Fat: 4g
- Unsaturated Fat: 2g
- Trans Fat: 0g
- Carbohydrates: 20g
- Fiber: 1g
- Protein: 2g
- Cholesterol: 10mg