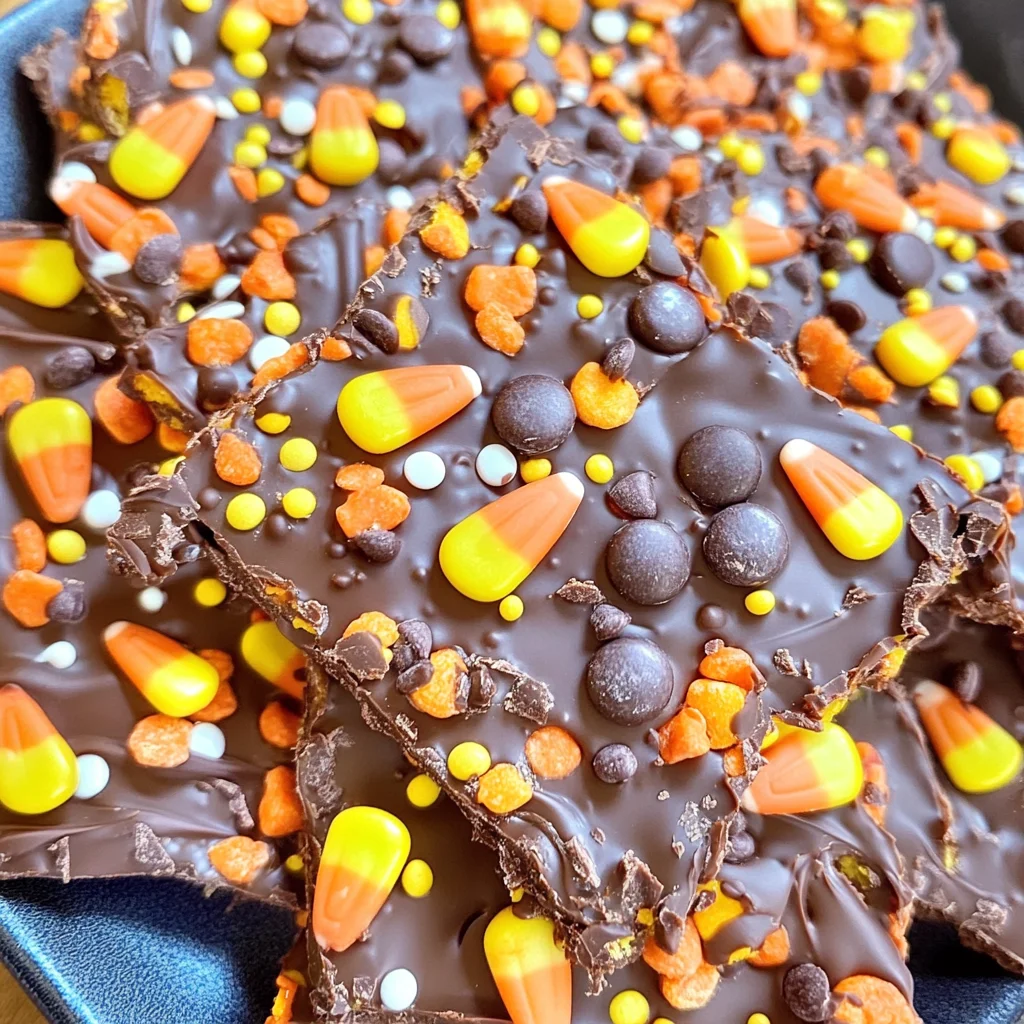
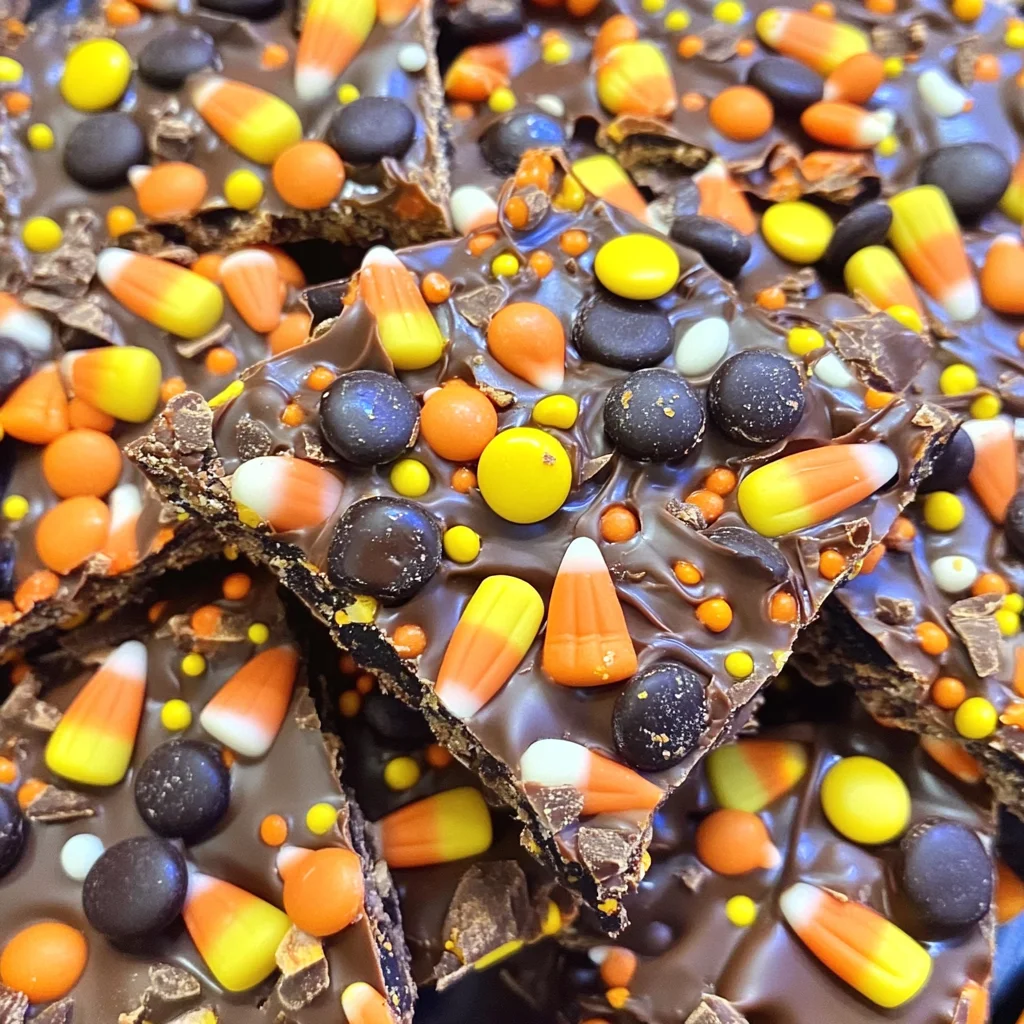
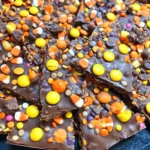
Halloween Bark
If you’re looking for a fun and festive treat to celebrate the Halloween season, look no further than Halloween Bark! This delightful creation is not only super easy to whip up, but it also brings out the kid in everyone. With layers of rich chocolate and creamy peanut butter topped with colorful candies and sprinkles, it’s a sweet addition to any gathering, from Halloween parties to family movie nights. Plus, it makes a fantastic homemade gift for friends and neighbors.
What I love most about this Halloween Bark is that it’s incredibly versatile. You can make it with your favorite toppings or even change things up based on what you have at home. It’s a wonderful way to get the whole family involved in the kitchen, creating memories while enjoying delicious treats!
Why You’ll Love This Recipe
- Quick and easy: This recipe comes together in just about 15 minutes. Perfect for those busy days when you want something sweet without a lot of fuss!
- Family-friendly: Kids will love helping with this recipe, especially when it comes time to sprinkle on the candy and watch the chocolate melt.
- Customizable: Feel free to mix and match toppings based on your favorites or what you have on hand. The possibilities are endless!
- Perfect for sharing: With 18 servings, this Halloween Bark is ideal for parties, school treats, or simply enjoying with friends over coffee.
- Delicious flavor: The combination of chocolate and peanut butter is always a winner, making this bark irresistible!
Ingredients You’ll Need
For this Halloween Bark, you’ll need simple and wholesome ingredients that create a delightful treat everyone will adore. Gather these goodies before we jump into the fun of making our bark!
For the Bark
- 2 cups semi-sweet chocolate chips
- 1/4 cup peanut butter (crunchy or creamy)
For Toppings
- 1/2 cup candy corn
- 1/2 cup Reese’s Pieces candies or M&Ms
- 2 tablespoons sprinkles
- 1/4 cup candy eyeball sprinkles
Variations
One of the best things about Halloween Bark is how flexible it is! You can easily adapt this recipe to fit your taste or use what you have on hand.
- Change the chocolate: Try using milk chocolate or dark chocolate instead of semi-sweet for different flavors.
- Mix in nuts: Add some chopped nuts like almonds or peanuts for an extra crunch!
- Try different candies: Use your favorite seasonal candies, like pumpkin-shaped chocolates or gummy worms.
- Add spices: A pinch of cinnamon or pumpkin spice can give your bark a warm fall flavor twist.
How to Make Halloween Bark
Step 1: Prepare Your Workspace
Start by lining a rimmed baking sheet with parchment paper or a silicone mat. This will prevent the bark from sticking and make cleanup easier later on! Pour your sprinkles and candies into small bowls so they’re ready when you need them.
Step 2: Melt the Chocolate Mixture
In a pan, heat some water until it’s hot but not boiling. Place your heat-safe bowl filled with chocolate chips and peanut butter over the hot water (just be sure that the water doesn’t touch the bowl). Stir occasionally until everything is melted together into a smooth mixture. This gentle melting method helps keep the chocolate silky!
Step 3: Spread It Out
Once melted, carefully remove your bowl from the heat using oven mitts (it can be hot!). Pour that luscious mixture onto your prepared baking sheet and spread it out evenly into a thin layer. This step is important because a thin layer allows for easier breaking later on.
Step 4: Get Creative with Toppings
Now comes the fun part! Sprinkle your toppings—candy corn, Reese’s Pieces (or M&Ms), sprinkles, and candy eyeballs—over the melted chocolate layer. Don’t be shy; make it as colorful as possible!
Step 5: Chill Out
Pop your baking sheet into the refrigerator for about 2 hours or until the chocolate is completely set. This waiting time means you can enjoy all those delicious textures once it’s ready!
Step 6: Break It Up
When you’re ready to serve, take out your Halloween Bark from the fridge and break it into pieces. Serve it on a platter for guests to enjoy or package individual pieces in cellophane bags as cute little treats!
With these steps complete, you’ll find yourself with an incredible batch of Halloween Bark that’s perfect for sharing—or keeping all to yourself! Enjoy every bite!
Pro Tips for Making Halloween Bark
Making Halloween Bark is a delightful experience, and a few pro tips can make it even easier and more enjoyable!
-
Choose Quality Chocolate: Using high-quality semi-sweet chocolate chips ensures a smoother texture and richer flavor, which makes your bark truly irresistible.
-
Prep Your Toppings Ahead: Having your candy corn, Reese’s Pieces, and sprinkles ready to go saves time and prevents the chocolate from hardening while you’re trying to decorate.
-
Don’t Overheat the Chocolate: Keep the heat low when melting the chocolate. Overheating can cause the chocolate to seize up, making it difficult to spread.
-
Use a Baking Sheet with Edges: A rimmed baking sheet helps contain any melted chocolate as you spread it out, preventing spills and making cleanup easier.
-
Customize for Allergies: If you’re serving guests with dietary restrictions, consider swapping out the candies for allergy-friendly options like dairy-free chocolate or gluten-free treats.
How to Serve Halloween Bark
Presentation is key when serving Halloween Bark! With its vibrant colors and festive toppings, you’ll want to showcase this treat in style.
Garnishes
- Drizzle of White Chocolate: A light drizzle of melted white chocolate over the bark adds a beautiful contrast and extra sweetness.
- Extra Sprinkles: Sprinkle some additional Halloween-themed sprinkles on top just before serving for an extra touch of festivity.
Side Dishes
- Pumpkin Spice Popcorn: This sweet and savory snack is perfect for fall gatherings. Toss popcorn with pumpkin spice seasoning for a crunchy complement to your bark.
- Caramel Apple Slices: Fresh apple slices dipped in caramel sauce offer a refreshing contrast to the rich flavors of the Halloween Bark.
- Ghostly Cheesecake Bites: Mini cheesecake bites decorated with ghost faces make for an adorable side that will delight both kids and adults alike.
- Fruity Halloween Punch: A fruity punch made with juice and soda is a fun beverage that pairs wonderfully with sweets. You can even add floating fruit pieces for extra flair.
Now that you know all about making, serving, and enhancing your Halloween Bark, you’re set for a spooktacular gathering! Enjoy creating this festive treat that everyone will adore.
Make Ahead and Storage
Halloween Bark is not only a delightful treat to enjoy right away, but it also shines as an excellent option for meal prep. You can make a batch ahead of time and store it for later use, making it perfect for parties or snacking!
Storing Leftovers
- Store any leftover Halloween Bark in an airtight container.
- Keep it in a cool, dry place to maintain its texture and flavor.
- It’s best enjoyed within two weeks, but it should hold up well if stored properly.
Freezing
- If you want to keep Halloween Bark for longer, consider freezing it.
- Cut the bark into pieces and wrap each piece individually in plastic wrap before placing them in a freezer-safe bag.
- Label the bag with the date and enjoy within three months for the best quality.
Reheating
- There’s no need to reheat Halloween Bark since it’s best served cold or at room temperature.
- Simply take out the amount you need from storage and allow it to sit for a few minutes before serving.
FAQs
Here are some common questions about making Halloween Bark that might help clarify your baking experience!
Can I use different types of chocolate for Halloween Bark?
Absolutely! You can substitute semi-sweet chocolate chips with dark chocolate, milk chocolate, or even white chocolate. Just remember that different chocolates may alter the sweetness and flavor profile of your Halloween Bark.
What can I add to my Halloween Bark besides candy?
Feel free to get creative! You can add nuts, dried fruits, or other candies that fit your taste. This versatility makes Halloween Bark an exciting treat that you can customize based on your preferences.
How long does Halloween Bark last?
When stored properly in an airtight container at room temperature, Halloween Bark can last up to two weeks. If frozen, it will stay fresh for about three months.
What is the best way to break the bark into pieces?
After chilling and setting, simply lift the bark from the baking sheet using the parchment paper. Break it into pieces by hand or use a sharp knife if you prefer more uniform sizes.
Final Thoughts
I hope you feel inspired to whip up this fun and festive Halloween Bark! It’s such a wonderful blend of flavors and textures that brings joy not just during Halloween but all year round. Whether you’re making it for a party or just treating yourself (you deserve it!), I know you’ll love how quick and easy this recipe is. Happy baking, and enjoy every delicious bite!
Halloween Bark
Get ready to celebrate Halloween with a delightful treat that’s sure to please both kids and adults alike—Halloween Bark! This easy-to-make confection features a luscious blend of semi-sweet chocolate and creamy peanut butter, topped with colorful candies and sprinkles. Whether you’re hosting a spooky gathering, enjoying a cozy family movie night, or looking for a fun homemade gift, this Halloween Bark fits the bill perfectly. In just about 15 minutes, you can whip up this sweet delight that encourages creativity in the kitchen and brings everyone together. So gather your family, get those creative juices flowing, and enjoy making this festive bark!
- Prep Time: 15 minutes
- Cook Time: N/A
- Total Time: 0 hours
- Yield: Approximately 18 servings 1x
- Category: Dessert
- Method: Baking
- Cuisine: American
Ingredients
- 2 cups semi-sweet chocolate chips
- 1/4 cup peanut butter (crunchy or creamy)
- 1/2 cup candy corn
- 1/2 cup Reese's Pieces candies or M&Ms
- 2 tablespoons sprinkles
- 1/4 cup candy eyeball sprinkles
Instructions
- Prepare your workspace by lining a rimmed baking sheet with parchment paper.
- Melt the chocolate chips and peanut butter using a double boiler method until smooth.
- Spread the melted mixture evenly onto the lined baking sheet.
- Generously sprinkle candy corn, Reese's Pieces (or M&Ms), regular sprinkles, and candy eyeballs over the melted chocolate.
- Chill in the refrigerator for about 2 hours until set.
- Break into pieces and serve or package for sharing.
Nutrition
- Serving Size: 1 piece (approximately 28g)
- Calories: 130
- Sugar: 12g
- Sodium: 35mg
- Fat: 8g
- Saturated Fat: 3g
- Unsaturated Fat: 5g
- Trans Fat: 0g
- Carbohydrates: 14g
- Fiber: 1g
- Protein: 2g
- Cholesterol: 0mg