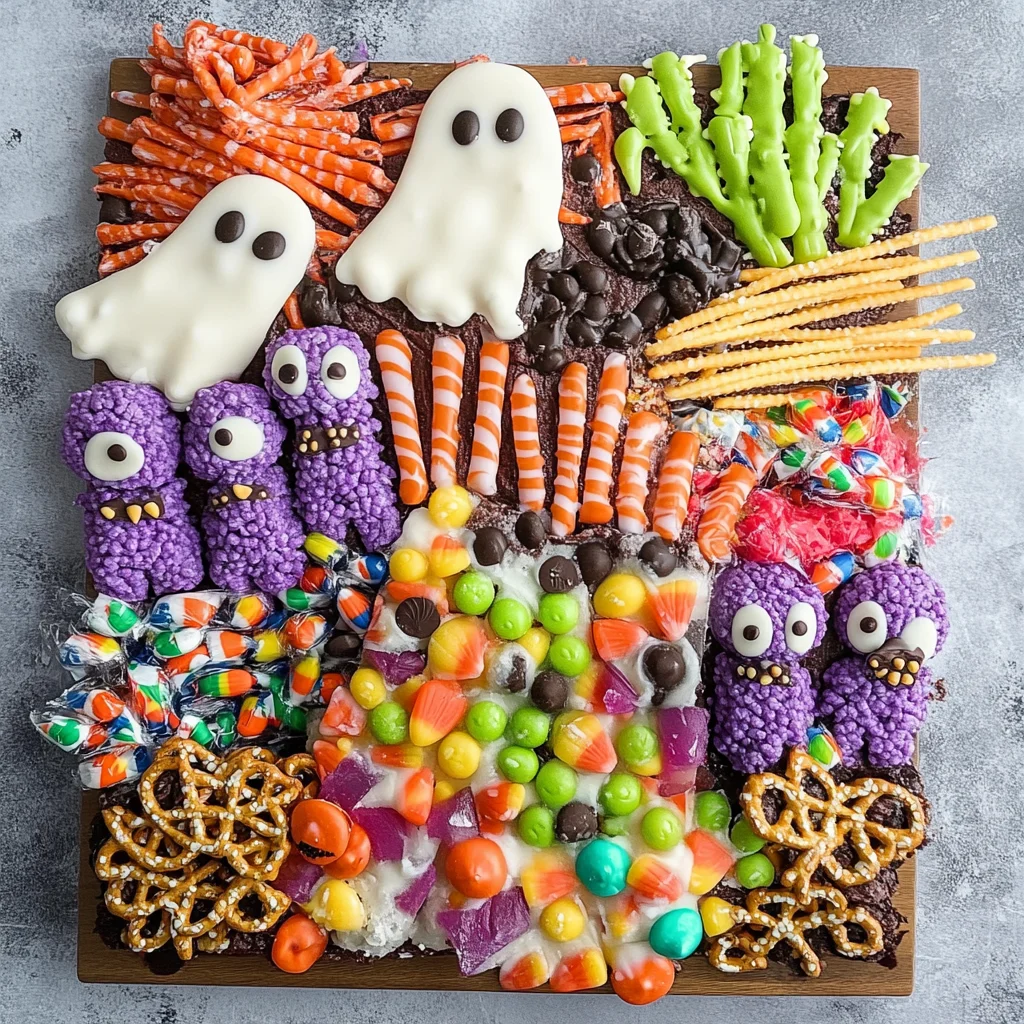
Halloween Charcuterie Board
If you’re looking for a fun and festive way to celebrate Halloween, this Halloween Charcuterie Board is just what you need! It’s not only a treat for the eyes but also a delightful mix of flavors that everyone will love. This recipe has quickly become a favorite in my home, especially during spooky season gatherings and cozy movie nights. With easy-to-follow steps and playful decorations, it’s perfect for creating lasting memories with family and friends.
What makes this Halloween Charcuterie Board extra special is how customizable it is. You can scale it up or down depending on your crowd, and kids will have a blast helping you put it together. So, gather your favorite candies and let’s get started on this sweet adventure!
Why You’ll Love This Recipe
- Easy to assemble: No complicated techniques here! Just dip, decorate, and arrange for a stunning display.
- Family-friendly fun: Kids can join in the fun by creating their own spooky treats. It’s a great way to bring everyone together!
- Perfect for any occasion: Whether it’s a Halloween party or just a night in with the family, this board will be the highlight.
- Make-ahead convenience: Prepare the chocolate-dipped “creatures” ahead of time for stress-free entertaining.
- Deliciously diverse treats: With so many different candies included, there’s something for everyone to enjoy!

Ingredients You’ll Need
Gathering these ingredients is part of the fun! They’re all simple, wholesome items that make this Halloween Charcuterie Board a delightful project. Here’s what you’ll need to create your spooky spread:
For the Chocolate-Dipped Treats
- 8 rice krispie treats
- 5 ounces white chocolate melting wafers
- purple food dye
- candy eyes
- purple sprinkles
- 8 pretzel rods
- 10 ounces white chocolate melting wafers
- green food dye
- sliced almonds
- 8 Nutter Butter cookies
- 5 ounces white chocolate melting wafers
- mini chocolate chips
For the Sweet Additions
- 8 Mini Reese’s Cups
- 8 Oreo Thins
- candy eyes
- 18 ounces Smarties
- 16 ounces red licorice
- 15 ounces Assorted Hershey’s Candy
- 28 ounces sour pectin-based gummy candies
- 40 ounces candy corn
Variations
This Halloween Charcuterie Board is super flexible! Feel free to get creative and switch things up based on your preferences or what you have on hand.
- Add different candies: Mix in your favorite sweets like gummy worms or chocolate-covered pretzels for added variety.
- Change up the colors: Use different food dyes to create other spooky themes—think orange and black for classic Halloween vibes.
- Make it healthier: Swap out some candies for dried fruits or dark chocolate options that still feel festive but are a bit lighter.
- Themed decorations: Incorporate seasonal fruits like mini pumpkins or apples alongside your treats for an autumn twist.
How to Make Halloween Charcuterie Board
Step 1: Make the Monster Treats
To start your spooky creations, melt the white chocolate melting wafers according to package instructions. Once melted, mix in purple food dye until you achieve your desired color. Dip one side of each Rice Krispie treat into the melted chocolate and place candy eyes on top. Finish by sprinkling purple sprinkles to mimic hair! Lay them on parchment paper and let the chocolate set.
Step 2: Create Witch Fingers
Now onto those creepy witch fingers! Melt additional white chocolate wafers and stir in green food dye. Pour the melted mixture into a tall cup for easy dipping. Dip each pretzel rod into the green chocolate then place sliced almonds at the tip to resemble fingernails. Set these aside to harden on parchment paper.
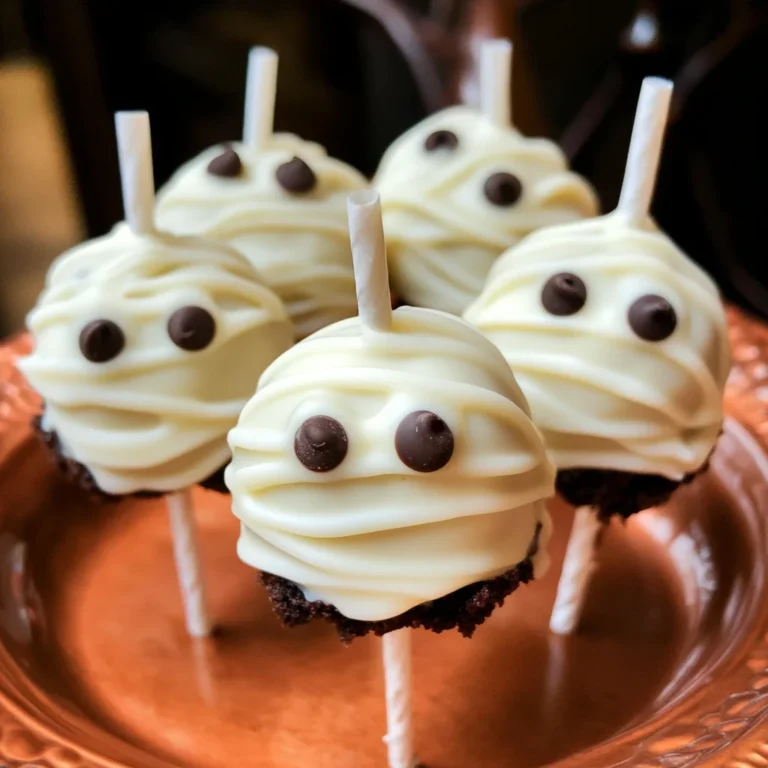
Step 3: Assemble Ghosts
Let’s make some adorable ghosts! Melt more white chocolate wafers and dip one side of each Nutter Butter cookie into the mixture. Place two mini chocolate chips as eyes and one for a mouth before allowing them to set on parchment paper.
Step 4: Assemble Bats
For those cute bats, unwrap Mini Reese’s Cups without removing their inner lining. Open each Oreo cookie carefully, scrape out the cream filling (don’t toss it!), and break each cookie in half for wings. Spread some of that cream filling onto the Reese’s Cup base, attach the cookie halves as wings, using more cream filling to secure candy eyes.
Step 5: Arrange Your Skeleton Centerpiece
Now it’s time for presentation! Place a skeleton diagonally across your serving board as the centerpiece. Stuff its rib cage with assorted candies; this adds an extra surprise element.
Step 6: Fill In with Treats
Finally, arrange all your larger decorated treats around the skeleton, filling any open spaces with even more candy goodness. Don’t be shy—make it colorful and inviting!
And there you have it! A stunning Halloween Charcuterie Board that’s sure to impress everyone at your gathering. Enjoy every delicious bite!
Pro Tips for Making Halloween Charcuterie Board
Creating a spooky and fun Halloween charcuterie board is all about the little details that make it pop! Here are some helpful tips to ensure yours is a showstopper.
-
Plan Your Layout: Start by arranging your larger treats first, ensuring they are evenly spaced. This helps create a balanced look and allows for easy access to all the goodies.
-
Use Colorful Candy: Incorporating brightly colored candies not only enhances the visual appeal of your board but also adds an exciting variety of flavors and textures that will delight your guests.
-
Mix Textures: Combine crunchy items like pretzel rods with softer options like Rice Krispie treats to create a more interesting eating experience. A variety of textures keeps everyone engaged!
-
Keep It Kid-Friendly: Ensure that all treats are suitable for kids by avoiding any potential choking hazards. This way, everyone can enjoy the fun without worry!
-
Make It Interactive: Consider providing small bags or boxes for guests to fill with their favorite candies from the board. This makes it a fun activity and allows guests to personalize their treats!
How to Serve Halloween Charcuterie Board
Presenting your Halloween charcuterie board is just as important as making it! Here are some creative ideas to showcase your delicious creations.
Garnishes
- Fresh Herbs: Sprigs of mint or rosemary not only add a pop of green but also a refreshing aroma that can complement sweet treats.
- Edible Flowers: Adding edible flowers can provide an elegant touch, making your board visually stunning while remaining completely edible.
Side Dishes
- Popcorn: A bowl of popcorn seasoned with Halloween-themed spices (like pumpkin spice) offers a light and crunchy contrast to the richness of the candies.
- Veggie Platter: Fresh veggies with a creamy dip provide a savory option amidst the sweetness, balancing out flavors on the table.
- Cheese Platter: A selection of cheeses paired with crackers can round out your charcuterie board beautifully, offering both taste and texture variety.
- Fruit Skewers: Colorful fruit skewers made with seasonal fruits like grapes, oranges, and apples add freshness and a burst of flavor that pairs well with sweets.
Now you’re ready to impress your guests with this delightful Halloween charcuterie board! Enjoy crafting this festive treat for any gathering this spooky season!
Make Ahead and Storage
This Halloween Charcuterie Board is not only fun to create but also perfect for meal prep! You can prepare many of the treats ahead of time, making it a breeze to assemble when it’s party time.
Storing Leftovers
- Store any leftover treats in an airtight container at room temperature for up to 3 days.
- Keep the chocolate-dipped items separate from candies to prevent them from sticking together.
Freezing
- Unfortunately, it’s best to enjoy this Halloween Charcuterie Board fresh, as freezing can affect the texture of chocolate-dipped treats.
- If you have extra candy, you can freeze it in a sealed container for later use.
Reheating
- Reheating is not necessary for this board as it’s designed to be enjoyed at room temperature.
- If you need to soften any hard candies, let them sit out at room temperature for a short while before serving.
FAQs
Here are some common questions about the Halloween Charcuterie Board that might help you as you prepare your spooky spread!
Can I customize my Halloween Charcuterie Board?
Absolutely! Feel free to swap out candies and treats based on your preferences or what you have on hand. Just maintain the fun and festive spirit with colorful options!
What’s included in a Halloween Charcuterie Board?
A Halloween Charcuterie Board typically includes an assortment of themed treats like candy, chocolate-dipped snacks, and decorative elements like skeletons. Use this recipe as a guide, but get creative!
How do I make my Halloween Charcuterie Board more interactive?
Consider adding some DIY elements where guests can decorate their own treats. Set out frosting, sprinkles, and other toppings for a fun activity!
Final Thoughts
I hope you’re excited to create this delightful Halloween Charcuterie Board! It’s such a fantastic way to bring friends and family together during the spooky season. Enjoy making each treat and remember that the best part is sharing it with loved ones. Happy Haunting!
Halloween Charcuterie Board
Get ready to impress your guests with a vibrant and spooky Halloween Charcuterie Board! This delightful display is perfect for any Halloween gathering, combining a variety of colorful treats that cater to all ages. With easy-to-follow steps, this fun project allows everyone to join in on the festive spirit, making it an ideal centerpiece for parties, movie nights, or family gatherings. From chocolate-dipped monsters to sweet candies, this board is not just visually stunning but also packed with flavors that will delight your taste buds. Let’s dive into the fun of assembling this festive snack board!
- Prep Time: 30 minutes
- Cook Time: 10 minutes
- Total Time: 40 minutes
- Yield: Serves approximately 10 people 1x
- Category: Dessert
- Method: Assembly
- Cuisine: American
Ingredients
- 8 rice krispie treats
- 5 ounces white chocolate melting wafers
- purple food dye
- candy eyes
- purple sprinkles
- 8 pretzel rods
- 10 ounces white chocolate melting wafers
- green food dye
- sliced almonds
- 8 Nutter Butter cookies
- 5 ounces white chocolate melting wafers
- mini chocolate chips
- 8 Mini Reese's Cups
- 8 Oreo Thins
- candy eyes
- 18 ounces Smarties
- 16 ounces red licorice
- 15 ounces Assorted Hershey's Candy
- 28 ounces sour pectin-based gummy candies
- 40 ounces candy corn
Instructions
- To start your spooky creations, melt the white chocolate melting wafers according to package instructions. Once melted, mix in purple food dye until you achieve your desired color. Dip one side of each Rice Krispie treat into the melted chocolate and place candy eyes on top. Finish by sprinkling purple sprinkles to mimic hair! Lay them on parchment paper and let the chocolate set.
- Melt additional white chocolate wafers and stir in green food dye. Pour the melted mixture into a tall cup for easy dipping. Dip each pretzel rod into the green chocolate then place sliced almonds at the tip to resemble fingernails. Set these aside to harden on parchment paper.
- Melt more white chocolate wafers and dip one side of each Nutter Butter cookie into the mixture. Place two mini chocolate chips as eyes and one for a mouth before allowing them to set on parchment paper.
- Unwrap Mini Reese's Cups without removing their inner lining. Open each Oreo cookie carefully, scrape out the cream filling, and break each cookie in half for wings. Spread some of that cream filling onto the Reese's Cup base, attach the cookie halves as wings, using more cream filling to secure candy eyes.
- Place a skeleton diagonally across your serving board as the centerpiece. Stuff its rib cage with assorted candies; this adds an extra surprise element.
- Finally, arrange all your larger decorated treats around the skeleton, filling any open spaces with even more candy goodness. Don’t be shy—make it colorful and inviting!
Nutrition
- Serving Size: 1 serving
- Calories: 320
- Sugar: 35g
- Sodium: 90mg
- Fat: 15g
- Saturated Fat: 8g
- Unsaturated Fat: 6g
- Trans Fat: 0g
- Carbohydrates: 43g
- Fiber: 2g
- Protein: 3g
- Cholesterol: 0mg