Halloween Pudding Cups
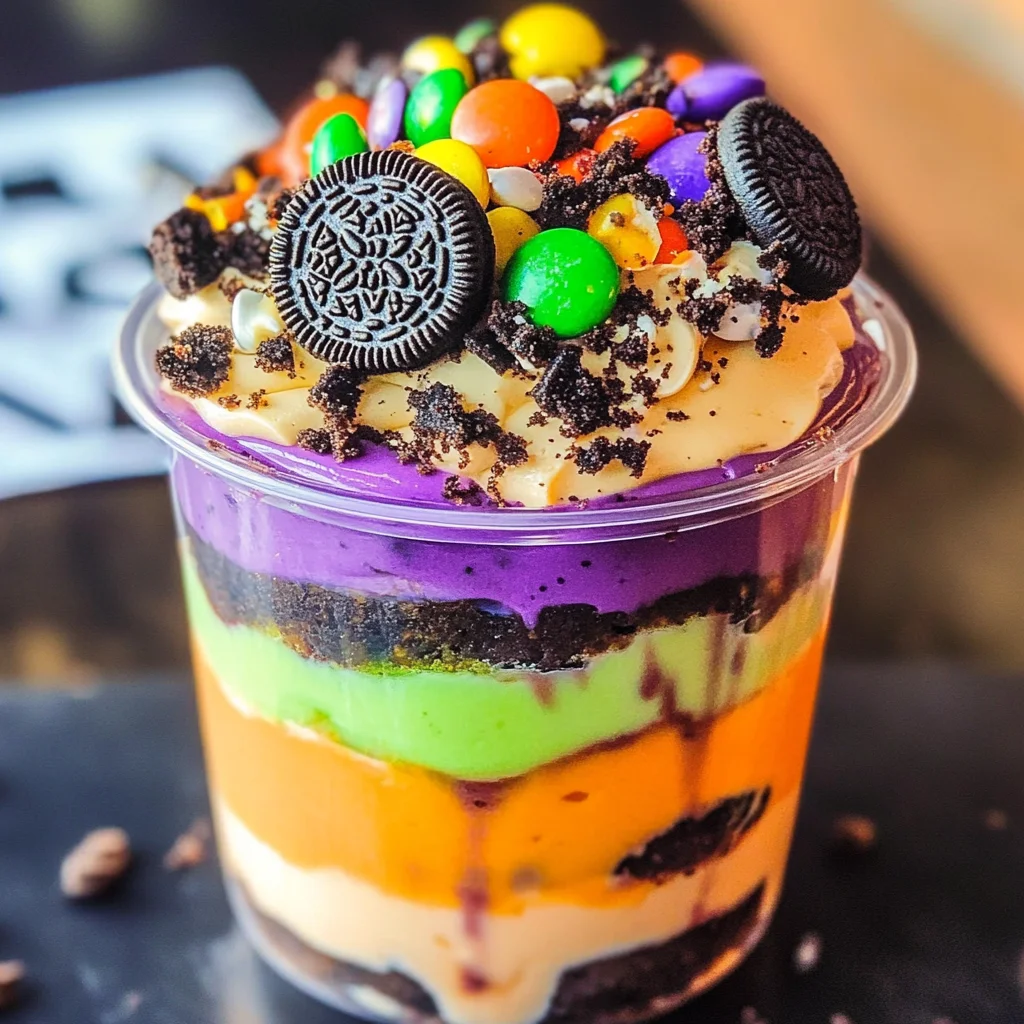
If you’re looking for a fun and spooky treat to impress your friends and family this Halloween, these Halloween Pudding Cups are just the ticket! This recipe puts a delightful spin on the classic dirt cup by layering chocolate cake, creamy pudding, and crushed Oreos, all dressed up in festive colors. Whether you’re hosting a Halloween party or simply want to add some cheer to a family gathering, these cups are sure to bring smiles all around.
What makes this dessert even more special is how easy it is to prepare. You can get the kids involved in decorating their own cups, making it a fantastic activity for everyone. Plus, with the vibrant colors and playful presentation, they’re perfect for any autumn celebration!
Why You’ll Love This Recipe
- Simple Preparation: With just a few steps, you’ll have an impressive dessert that looks like it took hours to create!
- Family-Friendly Fun: Kids will love helping to layer the pudding and decorate their cups with candy and sprinkles.
- Make-Ahead Convenience: Prepare the components in advance so you can enjoy more time with your guests on party day.
- Deliciously Decadent: The combination of chocolate cake, creamy pudding, and crunchy Oreos is undeniably delicious.
Ingredients You’ll Need
This recipe uses simple, wholesome ingredients that come together beautifully. Here’s what you need to make your Halloween Pudding Cups:
For the Cake
- 1 15.25 ounce box devils food cake
- Water (plus oil and eggs as directed on the box)
For the Pudding
- 2 3.4 ounce boxes white chocolate instant pudding
- 4 cups cold milk
For Assembly
- 8 ounces whipped topping
- Neon green (orange and purple food coloring)
- 1 ½ cups crushed Oreo cookies
- Milano cookies
- Halloween candy and sprinkles for decor
- 10 8 ounce clear buckets
Variations
This recipe is wonderfully flexible! Here are some fun ways to give your Halloween Pudding Cups a personal touch:
- Change the Flavor: Swap out the white chocolate pudding for vanilla or butterscotch for a different taste.
- Add Some Fruit: Layer in some sliced bananas or strawberries between the pudding layers for extra flavor.
- Go Gluten-Free: Use gluten-free cake mix and cookies to make these treats suitable for everyone.
- Create a Vegan Option: Substitute non-dairy milk and use vegan whipped topping for a plant-based alternative.
How to Make Halloween Pudding Cups
Step 1: Bake the Cake
Start by preheating your oven to 350 degrees. Grease a 9×13 baking dish while you’re at it! In a large bowl, combine your cake mix with water, oil, and eggs according to the instructions on the box. Pour this mixture into your prepared baking dish and bake as directed. Once it’s done baking, let it cool completely on a cooling rack before slicing it into bite-sized squares. This step is crucial because you want nice, moist pieces that will layer beautifully in your cups.
Step 2: Prepare the Pudding
While your cake cools, it’s time to whip up that delicious pudding! In another bowl, combine the white chocolate instant pudding with cold milk. Mix until it thickens — this should only take a couple of minutes! Once thickened, divide it into three separate bowls. This is where the fun begins; add different food colors into each bowl until you get shades that scream Halloween! Mixing bright neon colors adds such an exciting twist.
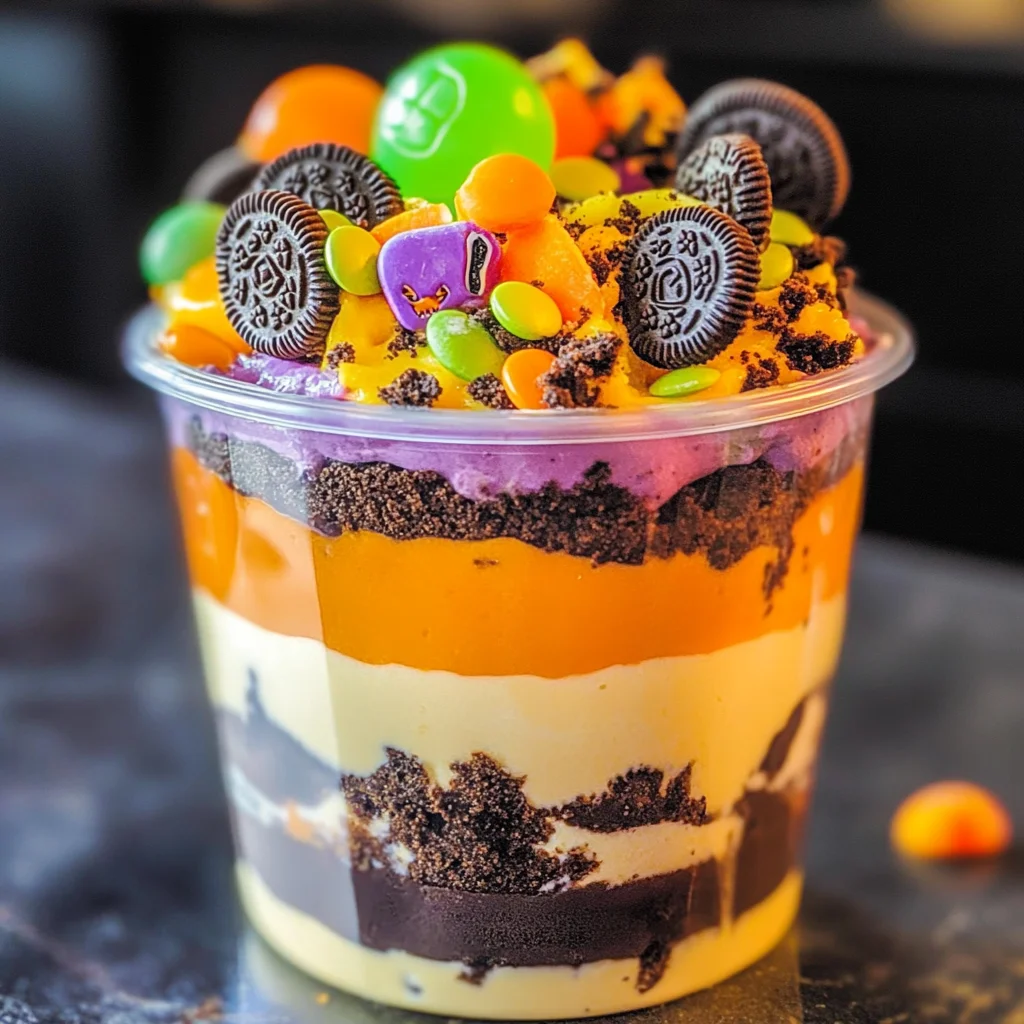
Step 3: Assemble Your Cups
Now comes the best part—layering! Grab those clear buckets and start with a layer of chocolate cake at the bottom. Next, add a layer of one of your colorful puddings followed by some crushed Oreos for crunch. Repeat these layers until you reach the top of each cup. Finish off each cup with whipped topping and sprinkle some Halloween candy or sprinkles on top for that extra festive touch!
Step 4: Chill and Serve
Once you’ve finished assembling all your cups, pop them in the fridge for at least an hour before serving. This allows everything to set nicely together. When it’s time to enjoy them, watch out—you might just find them disappearing faster than you can say Boo!
Enjoy making these delightful Halloween Pudding Cups—they’re sure to be a hit!
Pro Tips for Making Halloween Pudding Cups
Creating the perfect Halloween Pudding Cups is a delightful experience, and a few handy tips can elevate your dessert game!
- Use room temperature ingredients – This helps the cake mix and pudding blend smoothly, ensuring a consistent texture throughout your dessert.
- Let the cake cool completely – A cooled cake makes it easier to cut into squares without crumbling, giving your pudding cups a neat appearance.
- Layer creatively – Don’t be afraid to experiment with the order of layers! Alternate between colors and cookie layers for a fun visual effect.
- Be generous with toppings – A variety of candies and sprinkles not only adds flavor but also gives a festive touch that’s perfect for Halloween celebrations.
- Chill before serving – Letting the assembled cups chill for at least an hour allows the flavors to meld together beautifully, enhancing the overall taste.
How to Serve Halloween Pudding Cups
Serving your Halloween Pudding Cups in an eye-catching way can make all the difference at your spooky gathering! Here are some creative ideas to present this delicious treat.
Garnishes
- Edible glitter – A sprinkle of edible glitter can add a magical touch that captures the essence of Halloween!
- Candy eyeballs – Placing candy eyeballs on top will bring a fun and whimsical element to your dessert, making them even more appealing.
Side Dishes
- Fruit skewers – Colorful fruit skewers made with grapes, melon, and strawberries add a refreshing contrast to the rich flavors of the pudding cups.
- Veggie platter with dip – A selection of vegetables served with hummus or ranch dressing provides a healthy option that balances out the sweetness of the pudding.
- Cheese and cracker board – Offer a simple cheese and cracker platter for guests who might want something savory alongside their dessert.
- Mini pumpkin muffins – These adorable mini muffins not only fit the theme but also provide another delightful sweet option at your gathering.
With these tips and serving suggestions, your Halloween Pudding Cups will surely be a hit! Enjoy crafting this fun dessert that brings both taste and festivity to your holiday celebrations!
Make Ahead and Storage
These Halloween Pudding Cups are perfect for meal prep! You can easily make them ahead of time, allowing you to enjoy more time with your guests during the festivities.
Storing Leftovers
- Store any leftover pudding cups in an airtight container in the refrigerator.
- Consume within 3-4 days for the best taste and texture.
- If you have leftover cake, keep it stored separately to maintain its freshness.
Freezing
- While this dessert is best enjoyed fresh, you can freeze the individual layers.
- Place the pudding in airtight containers and freeze for up to one month.
- Thaw overnight in the refrigerator before assembling.
Reheating
- There’s no need to reheat these cups, but if you’ve frozen any components, allow them to come to room temperature after thawing.
- For a fun twist, consider warming up some leftover cake pieces just until slightly warm before serving.
FAQs
Here are some common questions about Halloween Pudding Cups that might help you!
Can I make Halloween Pudding Cups in advance?
Absolutely! These delightful cups can be assembled a day ahead of your event. Just keep them stored in the refrigerator until you’re ready to serve.
What variations can I try for Halloween Pudding Cups?
Feel free to get creative! You can use different colors of food coloring for the pudding and top with various Halloween-themed candies or sprinkles. Mix things up with chocolate cake or even vanilla pudding!
How many servings do Halloween Pudding Cups make?
This recipe makes 10 servings, perfect for a small gathering or party!
What can I use instead of whipped topping?
You can substitute whipped topping with coconut whipped cream or another dairy-free alternative if you’re looking for a lighter option without animal-derived ingredients.
Final Thoughts
I hope you’re as excited about making these Halloween Pudding Cups as I am! They bring a festive touch to any celebration and are sure to delight both kids and adults alike. Enjoy every layer of this spooky treat, and don’t hesitate to share your creations with friends and family. Happy baking!
Halloween Pudding Cups
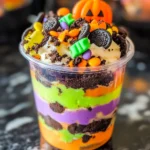
Get ready for a delightful Halloween treat that’s sure to impress! These colorful Halloween Pudding Cups are a fun twist on the classic dirt cup, featuring layers of moist chocolate cake, creamy pudding, and crunchy crushed cookies. Perfect for parties or family gatherings, this dessert is not only visually appealing but also incredibly easy to make. Involve the kids in decorating their own cups with festive toppings for an engaging activity. With vibrant colors and a deliciously decadent flavor, these pudding cups are guaranteed to bring smiles all around.
- Prep Time: 30 minutes
- Cook Time: 25 minutes
- Total Time: 55 minutes
- Yield: 10 servings 1x
- Category: Dessert
- Method: Baking
- Cuisine: American
Ingredients
- 1 box devils food cake mix
- 2 boxes white chocolate instant pudding
- 4 cups cold milk
- 8 ounces whipped topping
- Crushed Oreo cookies
- Food coloring (neon green, orange, purple)
- Halloween candy and sprinkles
Instructions
- Preheat the oven to 350°F (175°C) and grease a 9×13 baking dish.
- Prepare the devils food cake mix according to package instructions and bake until done. Allow to cool completely before cutting into squares.
- In a bowl, mix white chocolate pudding with cold milk until thickened, then divide into three bowls. Add food coloring for fun Halloween shades.
- Layer each clear cup starting with cake pieces, followed by colored pudding layers and crushed Oreos. Repeat until filled.
- Top with whipped topping and sprinkle with candies or sprinkles for decoration.
- Chill in the refrigerator for at least one hour before serving.
Nutrition
- Serving Size: 1 cup (200g)
- Calories: 290
- Sugar: 24g
- Sodium: 150mg
- Fat: 15g
- Saturated Fat: 7g
- Unsaturated Fat: 8g
- Trans Fat: 0g
- Carbohydrates: 36g
- Fiber: 2g
- Protein: 3g
- Cholesterol: 20mg